
NVISAGE N2 Launch Monitor

$11,000.00

The NVISAGE N2 is NVISAGE's premium overhead launch monitor. It mounts on the ceiling and reads every shot with three cameras over a 31.5" x 23.6" impact zone, using any golf ball.

Each shot returns 27 ball, club and launch data points, and the N2 comes with NVISAGE's MURLIE and MURLIE-X software with no subscription fees. MURLIE also connects it to GSPro, E6 Apex and E6 Connect, and Creative Golf on Windows.

📦 This product qualifies for Free Shipping. Item(s) will be drop shipped directly to you from our partner vendors. Shipping times may vary depending on product availability and all items may not ship together or at the same time. Please note: if the product features add-ons that can be selected, certain options may come with their own shipping charge. You’ll be notified prior to checkout of any shipping expenses if applicable.

Estimated Shipping Timeframe: 5-7 business days from payment processing date.*

*Estimated shipping timeframes are subject to change based upon vendor product availability. Ship times are set by the product vendor and are subject to change without notice. Package items may ship separately and arrive on different days.

NVISAGE N2

NVISAGE's Premium Overhead Launch Monitor

The N2 mounts on the ceiling above your hitting area and reads ball, club and launch data with three cameras, using any golf ball.

  • 3Cameras
  • 6,000Frames per second
  • 31.5" x 23.6"Impact zone
  • 9.2' to 9.8'Camera lens height
NVISAGE N2 Launch Monitor front view showing its three camera lenses
NVISAGE N2 Launch Monitor straight rear view
Overhead Mount

Nothing on the Floor

The N2 hangs from a ceiling bracket with its camera lens 110.24" to 118.11" above the floor. Nothing sits beside the ball, so the hitting area stays open and nothing needs to be moved between sessions.

NVISAGE N2 Launch Monitor rear angle view with the port panel
Every Golfer

Right and Left Handed From One Unit

The 31.5" x 23.6" impact zone gives right and left handed golfers room to play from the same N2. Switch the handed mode in NVISAGE's software, or let GSPro, E6 or Creative Golf pass it to the sensor.

NVISAGE N-Hub Lite Ready Zone screens for the N2, with the Separate Ready Zone off and on with a Tee Zone set
Your Hitting Area

Set Your Own Ready Zone

In NVISAGE's N-Hub Lite software you can shape the Basic Zone inside the N2's maximum hitting area, and turn on a Separate Ready Zone to set a Tee Zone inside it, so the sensor watches exactly where you tee up.

Inside the N2

The Details Behind Every Shot

How the N2 reads your swing, and the software you can play with it.

  • NVISAGE N2 Launch Monitor front, showing its three camera lenses
    Technology

    Three Cameras, Watching From Above

  • Plain white golf ball with no dots, logos or markings
    Any Ball

    No Marked Balls Needed

  • NVISAGE MURLIE software main screen with Shot Analysis, Third-party Play, Putting and Course Play modes
    Software

    MURLIE and MURLIE-X Included

  • NVISAGE MURLIE Third-party Play window connecting to GSPro
    Simulator Software

    Play GSPro, E6 and Creative Golf

NVISAGE N2 Launch Monitor front and back views

The NVISAGE N2 is NVISAGE's premium overhead launch monitor. It mounts on the ceiling above your hitting area, with the center of its camera lens 110.24" to 118.11" above the floor, and reads every shot with three cameras over a 31.5" x 23.6" impact zone. It works with any golf ball, so there are no marked balls to buy.

Each shot returns 27 data points: 7 for the ball, including ball speed, spin and launch direction; 10 for the club, including club path, face angle, dynamic loft and impact location; and 10 for the launch, from carry and total distance to apex, flight time and landing angle. The cameras capture at 6,000 frames per second, and your numbers come back in about 0.2 seconds.

The N2 connects to a Windows PC by Ethernet and comes with NVISAGE's MURLIE and MURLIE-X software, with no subscription fees. MURLIE's Third-party Play mode also connects the N2 to GSPro, E6 Apex and E6 Connect, and Creative Golf.

NVISAGE N2 rear panel with the Ethernet port, power port and power button

The N2's rear panel has a LAN port for the Ethernet connection to your PC, a 24V DC power port, a USB port and a power switch. Use only the power adapter supplied with the N2.

SpecNVISAGE N2
Install typeOverhead, ceiling mounted
Size (W x H x D)37.6" x 5.7" x 7.9"
Weight19.8 lb
UseIndoor
Impact zone31.5" x 23.6"
Golf ballAny golf ball
Cameras3
Capture rate6,000 frames per second
Shot dataAbout 0.2 seconds after impact
Data points27 (7 ball, 10 club, 10 launch)
Mounting heightCamera lens center 110.24" to 118.11" above the floor
ConnectionEthernet to a Windows PC with a GigE network card
Rear panelLAN port, 24V DC power port, USB port, power switch
NVISAGE softwareMURLIE (up to 5 user profiles) and MURLIE-X, no subscription fees
Third party softwareGSPro, E6 Apex and E6 Connect, Creative Golf (Windows)
HandednessRight or left handed mode, set in software
Storage temperature32 to 104 F
Warranty12 months from NVISAGE

The N2 reports 27 data points on every shot, across the ball, the club and the launch.

CategoryData points
Ball (7)Ball speed, launch angle, launch direction, total spin, spin axis, side spin, back spin
Club (10)Club speed, club path, attack angle, face angle, dynamic loft, dynamic lie, face to path, horizontal impact, vertical impact, smash factor
Launch (10)Carry, total, run, side distance, side total, apex, apex distance, flight time, flight type, landing angle
NVISAGE N2 what's included: launch monitor, mounting plate, LAN cable, spirit level, club sticker, power adaptor, tapping screws and calibration board
  • NVISAGE N2 Launch Monitor
  • Ceiling bracket (mounting plate)
  • Calibration board
  • Ethernet (LAN) cable
  • Power adaptor and power cable
  • Spirit level
  • Club sticker
  • M4 x 12 mm truss head screws (5) and M4 x 35 mm truss tapping screws (10)
NVISAGE N2 installation diagram: sensor lens center 110.24 to 118.11 inches above the floor, tee 39.37 inches from the sensor center

Mounting Height and Position

Mount the N2 so the center of its camera lens is 110.24" to 118.11" above the floor, with the tee 39.37" from the center mark on the bracket and the bracket arrow pointing toward the tee.

Ceiling

NVISAGE recommends having the ceiling structure inspected by a qualified professional before installation, as extra reinforcement may be needed, and installing with two or more people.

Calibration

Calibrate when you first install the N2 and any time you move it. Place the calibration board on the floor with its long edge facing the screen, square to the screen, its center 39.37" from the screen, and level it with the spirit level.

Room

Keep mirrors and glass out of the cameras' view, avoid lighting that gives off infrared, and avoid having the N2 face the sun at sunrise or sunset. Store the N2 between 32 and 104 F.

NVISAGE's MURLIE software runs on a Windows 10 or 11 (64-bit) PC, and the N2 connects to it by Ethernet through a GigE network card. These are NVISAGE's figures for MURLIE; check the requirements of any third party software you plan to run as well.

ComponentRecommendedMinimum
Operating systemWindows 10 or 11 (64-bit)Windows 10 or 11 (64-bit)
ProcessorIntel i7 10th generation or higherIntel i5 8400
Memory16 GB or more8 GB
GraphicsNVIDIA RTX 30 series or higherGeForce GTX 1060
Graphics memory16 GB or moreNot listed
Storage50 GB or moreNot listed
NetworkGigE network card and Ethernet cableGigE network card and Ethernet cable

How the N2 compares with NVISAGE's N1 and NEO-E, from NVISAGE's published specifications.

FeatureN1N2NEO-E
Install typeOverheadOverheadPortable, on the floor
UseIndoorIndoorIndoor and outdoor
Cameras2, at 2,000 fps3, at 6,000 fps3, at 6,000 fps
Hitting area24" deep x 20" wide31.5" x 23.6"10" x 13"
Golf ballMarked ballsAny ballAny ball
Club dataClub speed10 club data points8 club data points
BatteryNoNoUp to 5 hours
Water and dust ratingNot listedNot listedIP65
Mounting9' to 10' above the hitting surfaceLens center 110.24" to 118.11" above the floorPortable
Garage Golf return steps for the NVISAGE N2: email us, we contact NVISAGE, pack it in the original packaging, ship it back

All returns and exchanges for NVISAGE products must be requested through Garage Golf and approved by Garage Golf before anything is sent back. Please do not contact NVISAGE directly, as this may delay your return.

To start a return, email us at contact@mygaragegolf.com.

How Returns Work

Once we receive your request, we will contact NVISAGE to see whether your product is eligible for return. We will let you know the vendor's answer and any terms that apply, such as a restocking fee or return shipping cost, before anything is sent back. Return eligibility is set by the vendor and approval is not guaranteed.

Condition Requirements

Unless the vendor approves otherwise, returned items must be unused, in like new condition and include:

  • Original packaging
  • All original components, hardware and cables
  • All manuals and documentation

Damaged or Defective Items

If your N2 arrives damaged, defective or missing a part, contact Garage Golf at contact@mygaragegolf.com within 48 hours of delivery. We will report it to NVISAGE right away and let you know the next steps.

How to Initiate a Return

  1. Email contact@mygaragegolf.com with your order number and the reason for your return.
  2. Our team will contact NVISAGE to confirm the item qualifies, then send you return instructions.
  3. Pack the item securely in its original packaging with all components.
  4. Ship it back using the instructions provided.

Refunds

Refunds are processed after the vendor receives and inspects the returned item. Once Garage Golf has been refunded for the purchase, we will in turn refund you to your original payment method.

NVISAGE N2 12 month manufacturer warranty from the purchase date, repair or replacement at NVISAGE's discretion

This product is covered by NVISAGE's 12 month manufacturer warranty, which runs from the date you first purchased it. During that time NVISAGE will, at its discretion, repair or replace a defective unit free of charge. The warranty covers the hardware.

It does not cover normal wear and tear, cosmetic damage, improper installation or maintenance, modification or unapproved third party software, misuse such as ball or club strikes, drops, weather or power surges.

Warranty claims go through NVISAGE support, starting with troubleshooting, and an approved claim needs an RMA before the unit is shipped. Reach out to us at contact@mygaragegolf.com and we'll help you through it. Read NVISAGE's full terms on its warranty page.

Installation

From Ceiling to First Shot

NVISAGE's installation guide in six steps. You'll need a ladder and a Phillips screwdriver, and everything else comes in the box.

  1. NVISAGE N2 installation diagram: sensor lens center 110.24 to 118.11 inches above the floor, tee 39.37 inches from the sensor center

    Pick the Spot

    Mount the N2 so the center of its camera lens sits 110.24" to 118.11" above the floor, with the tee 39.37" from the center mark on the bracket.

  2. NVISAGE N2 ceiling bracket with the arrow pointing toward the golf tee

    Mount the Bracket

    Separate the sensor from its bracket, point the bracket arrow toward the tee and fasten it to the ceiling with six M4 x 35 mm tapping screws. NVISAGE recommends having the ceiling checked by a qualified professional first.

  3. NVISAGE N2 sensor grooves lining up with the three pins on the ceiling bracket

    Hang the Sensor

    Line up the three grooves on the N2 with the three pins on the bracket, then push the sensor so the grooves lock onto the pins.

  4. NVISAGE N2 sensor secured to its bracket with M4 x 12 mm truss screws

    Lock It In

    Secure the sensor to the bracket with the M4 x 12 mm truss screws, then check that nothing is loose before you start hitting.

  5. NVISAGE N2 cable management grooves for the Ethernet and power cables

    Connect Power and PC

    Run the Ethernet cable from the N2 to the Ethernet port on your PC, connect the power adapter and route both cables through the grooves on the sensor.

  6. NVISAGE N-Hub Lite Ready Zone screen for the N2, with the Separate Ready Zone off and on

    Calibrate and Set Your Zone

    In NVISAGE's N-Hub Lite software, calibrate with the included calibration board, set your hitting zone and right or left handed mode, and you're ready to play.
Before You Install

Set Up the Room for Clean Reads

NVISAGE's own cautions for getting accurate data from the N2.

  • Keep Mirrors and Glass Out of View

    Mirrors or glass in the cameras' view can cause errors, so keep them out of the area the N2 looks at.
  • Watch for Infrared Lighting

    Lighting that gives off infrared can interfere with the cameras and cause the N2 to malfunction.
  • Mind the Low Sun

    If your bay gets daylight, avoid having the N2 face the sun at sunrise or sunset.
  • Check the Ceiling First

    NVISAGE recommends having your ceiling inspected by a qualified professional before mounting, with two or more people for the install.
Getting Ready

What Comes With It, and What You'll Need

In the Box

  • N2 Launch Monitor
  • Ceiling bracket (mounting plate)
  • Calibration board
  • Ethernet (LAN) cable
  • Power adaptor and power cable
  • Spirit level
  • Club sticker
  • M4 truss screws and M4 tapping screws

You Supply

  • Ladder
  • Phillips screwdriver
  • Windows 10 or 11 PC with a GigE network card
  • Grounded power outlet
Complete the Setup

Build Your N2 Simulator

The rest of the bay, from the enclosure and mat to the projector, PC and keyboard.

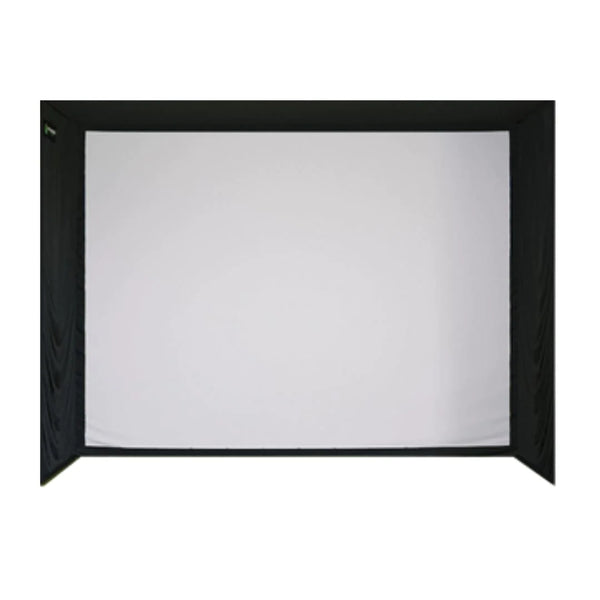
  1. SIG12 Golf Simulator Enclosure

    SIG12 Golf Simulator Enclosure

    A full golf simulator enclosure for your hitting bay.

    Shop Now
  2. Landing Pad Mat for SIG12 Golf Simulator Enclosure

    Landing Pad Mat for SIG12

    The landing pad mat made for the SIG12 enclosure.

    Shop Now
  3. SIGPRO Super Softy 4x9 Golf Mat

    SIGPRO Super Softy 4x9 Golf Mat

    A 4' x 9' hitting mat for your simulator bay.

    Shop Now
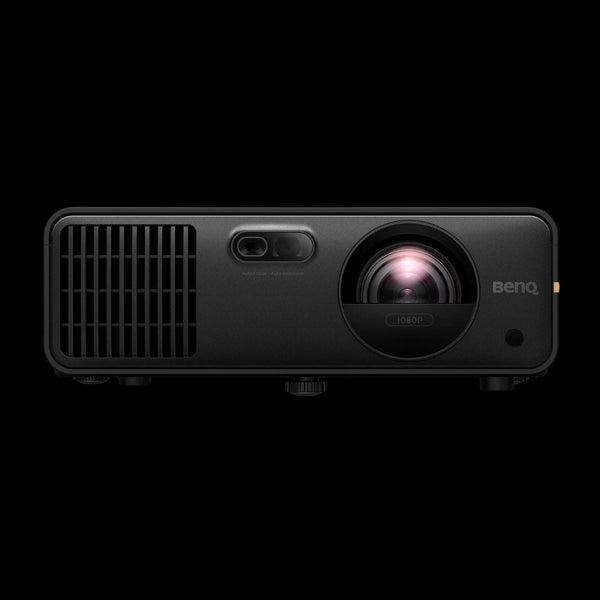
  4. BenQ AH700ST Golf Simulator Projector

    BenQ AH700ST Golf Simulator Projector

    A short throw golf simulator projector from BenQ.

    Shop Now
  5. Garage Golf PAR Desktop Package by XOTIC PC

    Garage Golf PAR Desktop by XOTIC PC

    Windows desktop with the Intel Core Ultra 7 265K option and an NVIDIA RTX 5060.

    Shop Now
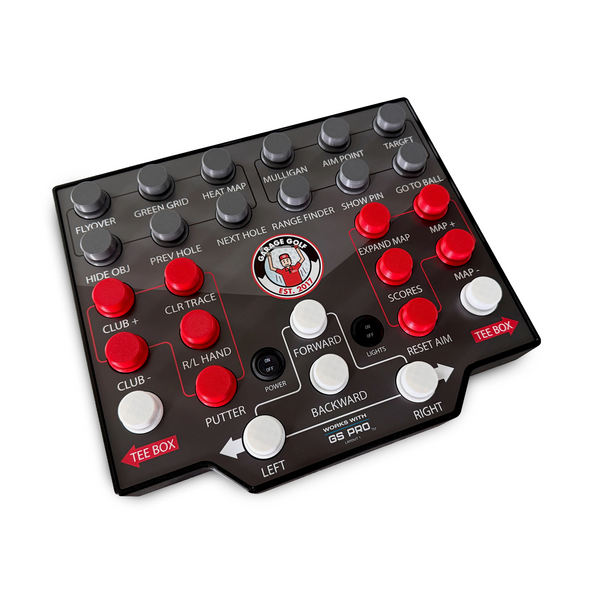
  6. Club Keyboard Pro 4 - 28 Button

    Club Keyboard Pro 4

    A 28 button wireless keyboard for your simulator.

    Shop Now

Product Videos

NVISAGE at the PGA Show 2026: Garage Golf Interview

MURLIE Software Walkthrough from NVISAGE

Frequently Asked Questions

NVISAGE calls for the center of the N2's camera lens to sit 110.24" to 118.11" above the floor, about 9.2' to 9.8'. The tee goes 39.37" from the center mark on the ceiling bracket, with the bracket arrow pointing toward the tee.

No. The N2 reads any golf ball. NVISAGE includes a club sticker that goes on the toe area of a driver, iron or putter for club data.

NVISAGE lists the N2 for indoor use, mounted on a ceiling. If you want an NVISAGE launch monitor for indoor and outdoor use, the portable NEO-E is the one NVISAGE rates for both.

The N2 comes with NVISAGE's MURLIE software, which stores up to 5 user profiles, and MURLIE-X course play, with no subscription fees. MURLIE's Third-party Play mode, on Windows, also connects the N2 to GSPro, E6 Apex and E6 Connect, and Creative Golf.

A Windows 10 or 11 (64-bit) PC with a GigE network card for the Ethernet connection. For MURLIE, NVISAGE recommends an Intel i7 10th generation or higher, 16 GB of memory and an NVIDIA RTX 30 series or higher graphics card, with a minimum of an Intel i5 8400, 8 GB of memory and a GeForce GTX 1060. Check the requirements of any third party software you plan to run too.

Yes. Right or left handed mode is set in NVISAGE's software, and when you play through GSPro, E6 or Creative Golf, the setting you choose in the game is applied to the sensor.

NVISAGE's installation guide uses a ladder and a Phillips screwdriver, and the bracket, screws, cables and calibration board come in the box. NVISAGE recommends having the ceiling inspected by a qualified professional first and installing with two or more people.

An Ethernet cable runs from the N2's LAN port to your PC, and the supplied power adapter plugs into its 24V DC port and a grounded outlet. Grooves on the sensor help route both cables neatly. NVISAGE says to use only the supplied adapter.

NVISAGE covers the N2 with a 12 month manufacturer warranty from your purchase date and will repair or replace a defective unit at its discretion. See the Warranty section above for what it does and doesn't cover.

One Team

Two Ways to Get Your Golf Simulator Done Right

  • A Garage Golf video consultation with a homeowner planning a golf simulator room
    Where Most Builds Start

    Free 30-Minute Consultation

    Cost: FREE

    Talk with our team about your room, your budget and your goals. We'll answer your product questions, walk through how everything can fit in your space and put together a recommended custom cart for your simulator.

    Always free. Your consultation and the product recommendations from it are yours to keep, whatever you decide.

  • Sample pages from a custom Garage Golf Build Plan, details blurred
    Take It One Step Further

    Garage Golf Build Plan

    Cost: $500.00 (credited back at purchase)

    Exact placement of every physical item in your custom cart, including your screen, launch monitor and projector, plus every outlet, Cat6 and HDMI run, in drawings and a rough-in plan you can hand straight to your contractor.

    Your full $500 is credited back when you buy the equipment your plan calls for through Garage Golf within 6 months.

Expert Product
Recommendations

Continuous Customer
Support

No sales pitches, just
honest advice

NVISAGE N2 Launch Monitor

NVISAGE N2 Launch NVISAGE N2 Launch Monitor

$11,000.00