


Your Sim Controls, Mounted Right Inside the Bay
- About 200 lbCapacity with flush mounted items
- 2Optional mounts: VESA and keyboard tray
- Oct. 2025+Pro Enclosure models it fits
- New or RetrofitInstall with the frame or add it later

The Carl's Place Vertical Crossbar System turns the side wall of a Carl's Place Pro Golf Simulator Enclosure into a built in equipment station. The crossbar runs vertically along the inside of the enclosure frame, giving you a solid place to mount a computer monitor or touchscreen, a keyboard tray and other compatible accessories right where you play, with no extra desk or cart taking up room in your golf space.
Think of it as the vertical partner to Carl's Place's horizontal, movable ceiling crossbar. The ceiling crossbar carries launch monitors and projectors overhead, while the vertical crossbar keeps your simulator controls within easy reach between shots. The black finish blends into the enclosure frame for a clean, integrated look, and the crossbar supports approximately 200 lb with flush mounted items. Actual capacity depends on the accessory mount used and how far its arm extends.
Choose the crossbar on its own, or add the VESA Monitor Mount, the Keyboard Tray Mount, or both. It can be installed while the enclosure frame is being assembled or retrofit to an existing compatible Pro Enclosure. For best results, place it even with or behind your tee position so mounted equipment stays out of the path of an errant shot.
| Spec | Vertical Crossbar System |
|---|---|
| Compatibility | Carl's Place Pro Enclosures released October 2025 or later |
| Finish | Black |
| Capacity | About 200 lb with flush mounted items |
| Crossbar fittings | 2 inch pipe opening, top and bottom depth pipes |
| Optional mounts | VESA Monitor Mount, Keyboard Tray Mount |
| Placement | Even with or behind the tee |


A Sidewall Equipment Station

Your Screen Where You Can See It

Keyboard and Mouse Within Reach
Built Into Your Enclosure, Not Next to It
A Better Use of Space
Mount your equipment to the enclosure wall instead of adding another piece of furniture to the room.Ready for Your Setup
Supports compatible monitor mounts, keyboard trays and future accessories.Clean, Integrated Look
The black finish blends into your enclosure frame.Built for the Pro Enclosure
Install it at or behind your tee during assembly, or retrofit it to an existing compatible enclosure.
Five Steps on a New Pro Enclosure Build

Plan the Location
Pick a spot even with or behind your tee. If the tee is 10 feet from the screen, place the crossbar at least 10 feet from the screen.

Add the Crossbar Fittings
Slide one crossbar fitting onto the bottom depth pipe and one onto the top depth pipe, oriented as the guide shows, with the fronts facing into the enclosure.

Assemble the Telescoping Pipe
Slide the two inner pipes into the outer pipe, leaving 6 to 7 inches out on each end, and snug the set screws.

Set and Center It
Seat the pipe in the bottom fitting, slide the center pipe up until it is centered, then extend the top pipe fully into the upper fitting.

Square It and Add Mounts
Confirm the crossbar is straight and in position, tighten every set screw, then install your monitor and keyboard tray mounts.
Three Things to Check

Enclosure Model
Fits new Pro Enclosure models released October 2025 or later from Carl's Place. Not sure which Pro Enclosure you have? Give us a call at 210-876-2002 and we'll help you check.

Placement
Install the crossbar even with or behind your tee position to help protect mounted equipment from errant shots.

Monitor Inputs
The VESA Monitor Mount works best with monitors that have input ports on the side or bottom. Ports on the back may be blocked by the mounting plate.
Build Out Your Carl's Place Pro Bay
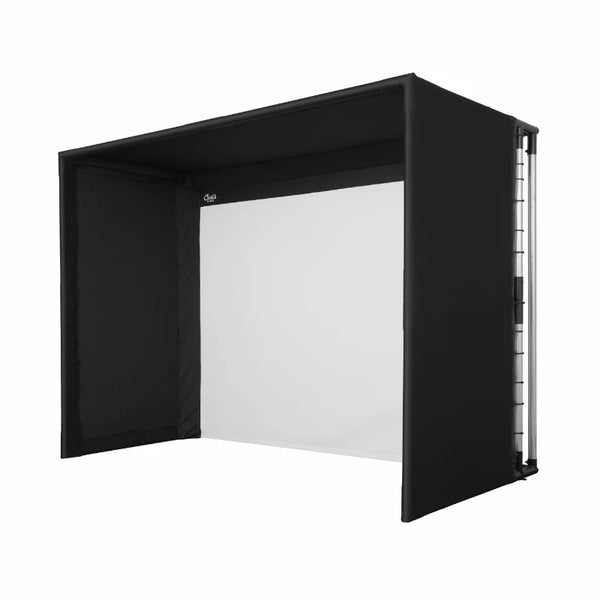
Carl's Place PRO Golf Simulator Enclosure Kit (New Model)
The Pro Enclosure the Vertical Crossbar is built to mount on.
Shop the Pro Enclosure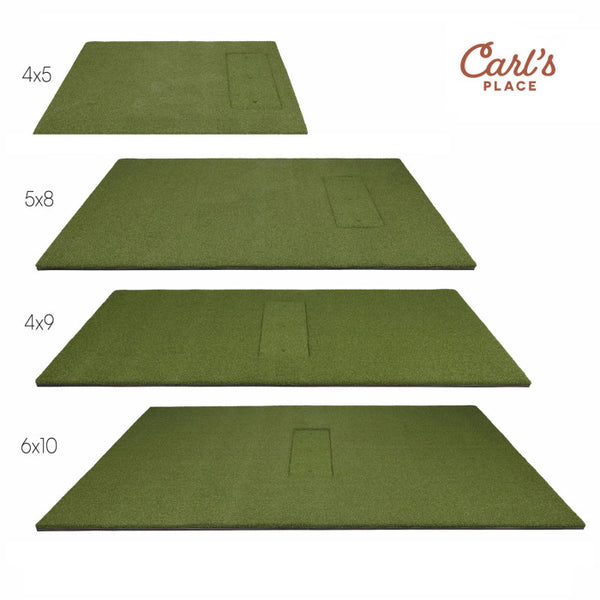
Carl's Place HotShot Golf Mat Systems
Carl's Place hitting mat systems for your tee position.
Shop HotShot Mats
Product Videos
How to Assemble the Carl’s Place Vertical Crossbar | Step-by-Step Guide
Frequently Asked Questions
Two Ways to Get Your Golf Simulator Done Right
 Where Most Builds Start
Free 30-Minute Consultation
Cost: FREE
Talk with our team about your room, your budget and your goals. We'll answer your product questions, walk through how everything can fit in your space and put together a recommended custom cart for your simulator.
Always free. Your consultation and the product recommendations from it are yours to keep, whatever you decide.
 Take It One Step Further
Garage Golf Build Plan
Cost: $500.00 (credited back at purchase)
Exact placement of every physical item in your custom cart, including your screen, launch monitor and projector, plus every outlet, Cat6 and HDMI run, in drawings and a rough-in plan you can hand straight to your contractor.
Your full $500 is credited back when you buy the equipment your plan calls for through Garage Golf within 6 months.
Product title
$19.99 | $24.99
Product title
$19.99 | $24.99
Product title
$19.99 | $24.99
Product title
$19.99 | $24.99
